

Thursday, 2 May 2013


Monday, 20 February 2012
The best book ever written...
...on the South West coast path, is most certainly this one:


Author and good friend of FELLWALK Ruth Luckhurst tells us that this is the first of many: she's been walking the entire South West Coast Path for the last couple of years from her base conveniently situated in, erm, the North West Highlands of Scotland. Dartmouth to Plymouth is the first of her titles; titles for other sections of the path will start appearing in bookshops in May. If you're interested in finding out just how Ruth manages to juggle writing guidebooks about the South West Coast Path whilst living in splendid isolation in the Scottish Highlands, have a look at her blog, A CERTAIN HUSH.
Ruth's book can be ordered from Amazon (just click on the picture above) or via our BOOKSHOP, of course.
Sunday, 19 February 2012
YOU can summit Kilimanjaro...
>TOP TEN TIPS FOR CONQUERING KILI
...just like these three...
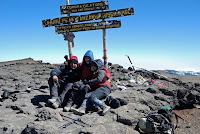 ...provided you follow our TOP TEN TIPS FOR CONQUERING KILI, that is.
Alternatively, just stay at home and watch other people doing stuff on telly.
...just like these three...

Alternatively, just stay at home and watch other people doing stuff on telly.
TEN TOP TIPS FOR CONQUERING KILI!
These 10 tips won't actually guarantee you'll reach the summit of Africa's highest, but follow them and you'll give yourself the best possible chance.
1) Don’t just sit there, do it!
Many people dream of climbing Kilimanjaro, but how many of them actually take the plunge? It needn’t be as difficult or as expensive as you’d think to get to the summit, but the most important thing is to commit yourself to climbing it. Telling someone you’re going to climb it, and set a date. That way, you’ll feel more duty bound to get off the sofa and give it a go.
Before you book:
2) Do your homework.
Find out as much as you can about the experience of climbing Kilimanjaro long before you go. That way you’ll be prepared. The fact that you’re reading this should show you that, at the very least, you’ve made a start. Buy, and read, the Trailblazer Kilimanjaro the Trekking Guide to Africa's Highest Mountain: Includes Mount Meru & Guides to Arusha, Moshi, Marangu, Nairobi & Dar-Es-Salaam

. Having read many other Kilimanjaro guidebooks, we’d argue that it’s the best there is by a considerable margin.
3) Realise that it’s going to cost you.
Climbing Kilimanjaro is almost certainly something you’ll do only once, so why jeopardise your chances of success by cutting corners? Spend what you have to in order to ensure you enjoy your climb. This advice applies to your choice of route, your choice of climb operator and your choice of equipment – it can be bloody cold and windy at 4am halfway into space – so make sure you’ve not skimped on your clothing and / or equipment.
4) Choose the right route.
Your choice of route will be a major factor in determining whether you reach the summit or not. Each route has its pros and cons, so find out about them all and choose the one that will be right for you. We wouldn’t recommend the Marangu or the standard Rongai, as they’re short and give you little chance to acclimatise. That’s not to say that people don’t make it to the summit, and enjoy the experience, on these routes, just that they lessen your chance of summitting whilst increasing your chances of vomiting. The fact that we went on Team Kilimanjaro’s 7-day Rongai route naturally biases us towards it, but our decision to go with this route came at the end of a lot of research. A good place to start your research would be on Team Kilimanjaro’s ROUTES page. (If it seems like we have a bias toward Team Kilimanjaro, well, yes, we probably do, simply because their ethos seems to have more to do with getting you safely on and off the mountain than with pure profit. That doesn’t mean that there aren’t other climb operators who’ll offer the same level of service, just that Team Kilimanjaro are very good at what they do. We’d book with them again).
5) Choose a good climb operator.
There are lots of companies that will offer to take you up Kilimanjaro, many of whom will offer the experience at a comparatively low price. Remember though, climbing with an operator that has well-trained guides will make your experience not only more enjoyable, but also safer. The Trailblazer Trekking Guide lists them all, so start your research there. A distinction must be made between the climb operators (such as Team Kilimanjaro, Zara, African Walking Company, Kiliwarriors) who actually run the climbs, and tour operators (such as Exodus, Explore Worldwide, KEA) who make the booking for you - taking their ‘cut’, of course - and pass you on to a climb operator of their choice when you reach Tanzania. Using a tour operator can be an easy way to book as they’ll generally give you an all-in price including flights, but has the downside that you’re paying a ‘middle-man’ to arrange something you can do yourself via the internet. Also, booking through a tour operator will almost certainly mean you will join a group travelling on a set date. If you’re happy to do that, fine, but if you’d prefer to have your own private trek, taking place on dates chosen by you, then consider approaching a climb operator directly. You’d imagine this option to be more expensive, but that isn’t necessarily the case.
6) Steer clear of ‘charity challenges’.
This sounds awful, but really, some of the charities truly are taking the mickey. What they tend to offer is the shortest itinerary with the cheaper operators, lessening your chances of success. In fact, if you try to push yourself too hard on a short itinerary, you also lessen your chances of getting off the mountain under your own steam (see tip 8). The charity challenges usually ask you to raise a minimum amount of sponsorship – typically about £3000 – and then you get to do the climb for free! Sounds great, but unless you have a significant amount of time on your hands or a heap of rich friends, raising that amount of money is going to be awfully hard work, and you may end up paying just as much yourself as if you’d booked the climb elsewhere. Also, as a significant portion of that £3000 (or whatever it is) goes to the climb operator on the mountain / hotel / airline, only the leftovers ever actually go towards the cause. Instead, we recommend you book the trek that’s best for you and independently raise money for your chosen charity. This way you can set your own – realistic - target for fundraising, happy in the knowledge that all the money you raise goes to a good cause.
Before you go:
7) Prepare yourself.
By this, we mean make sure you’ve spent a few nights in a tent and done a little training. Some say you needn’t do much training and it’s true that you don’t need to be super-fit to summit Kilimanjaro, but make sure you do at least a modicum of strenuous hillwalking before you go - even a little will give you more confidence when you reach the mountain. Oh, and stop worrying about the toilets / food. The former are not that bad, although having to visit them at 4600m when it’s -10 degrees Celsius and the middle of the night is unpleasant, but hey, that’s camping for you, and the food is delicious. Lower down the mountain you’ll be hungry and eat too much, but this is a good thing as it’ll give you energy for the later stages of the climb when the altitude may destroy your appetite. And also, make sure you get hold of all the equipment you’re asked to bring on the equipment list provided by your climb operator. A Camelbak or similar is incredibly useful for taking in the minimum of 3 to 5 litres of water you’ll have to drink every day on the mountain in order to combat the possibility of succumbing to altitude sickness.
8) Find out about mountain sickness.
This is vitally important for anyone going to altitude. Do some research, either on the internet or from books, so that you know how to cope with it and what to do if (when) you’re affected. Altitude Illness: Prevention and Treatment (Mountaineers Outdoor Expert)

by Steven Bezruchka is a cheap pocket book that is useful to carry with you on the mountain. Also, find out about the various drugs that are claimed to help alleviate the symptoms of altitude sickness, and consider whether you wish to take them. If you do, test them out for side-effects before you go.
On the mountain:
9) Take it slowly.
Your guide will tell you this but it’s worth repeating. On the first day of our climb we were overtaken by a German gentleman travelling so quickly that his concerned-looking guide was almost running to keep up with him. On our descent at Kibo huts we overheard some trekkers talking about a German man who’d been carted down the mountain unconscious in a wheelchair the previous day. He’d been affected by AMS. The same man? We'll never know for sure, but it might well have been. Why tire yourself out when you can take it slowly? There are no prizes for getting to the top first – someone’s done that already.
10) When things get tough realise that what you’re doing is simply a remarkable thing.
Good luck!
Thursday, 2 February 2012
SOL Emergency Bivvy REVIEW
Today on Fellwalk we're really pushing the boat out, by reviewing a plastic bag. Not just any old plastic bag though: this is the 'SURVIVE OUTDOORS LONGER' Adventure Medical Kits Heatsheets® Emergency Bivv


For years we've dutifully carried 'space blanket' type survival bags whenever we've gone onto the fells. We've never had occasion to use one, thankfully, and we're doubly pleased about this because, let's face it, space blanket material would be useless in an emergency. The slightest tug and it tears itself to shreds: goodness knows how you'd fare if injured on some rocky hillside in a high wind. So for a while we've been looking for something better. Luckily, with the SOL bivvy, we've found it.
The bivvy is constructed from a tough, slightly stretchy polythene which is a shiny orange on the outside - and potentially highly visible to rescuers - and silver on the inside, which the makers claim reflects back 90% of body heat. We tried it out in a non-emergency situation in one of the state rooms here at Fellwalk Towers, and can vouch for the fact that it keeps you toasty warm. In an emergency, it could be relied on to block out wind and rain, and, if the situation warranted, you could even cut a hole in the bottom, put it over your head and use it as an emergency windproof / warm jacket until you reached safety (although people might stare).

The SOL Bivvy is about, ooh, 213 centimetres long, and perhaps, ummm, 91cm across: easily big enough for just about anyone.
It comes in its own little stuffsack, and whilst very quick to deploy, is somewhat harder to get back into the stuffsack, but as it's only intended for emergency anyway, chances are this won't be something you'd have to do too often, unless you were really unlucky.
The only advantage we can see that our old space blanket bag has over the SOL bivvy is that it weighs a few grams less: the SOL is 107 grams; our space blanket is 83 grams. For the sake of 24g, we're sticking with the SOL, and we're looking for a new use for our old space blankets. Suggestions on an email please.
To sum up:
Highly recommended as a gift for the clumsy, the unlucky or the easily over-excited hill-walker in your life. In fact, EVERY hill walker should ALWAYS carry one of these. We give it a gold star, and 10 out of 10.
The lowest prices we can find for outdoor gear often seem to be on Amazon these days, and this is true for the SOL bivvy:
Wednesday, 1 February 2012
A Kentmere Round
This is a long walk, nowhere particularly steep or arduous. It takes in five Wainwrights: Yoke, Ill Bell, Froswick, Thornthwaite Crag and Mardale Ill Bell. With a little extra effort, it would be no problem to add High Street (just off the map to the north of Mardale Ill Bell), Harter Fell and Kentmere Pike.
Start / end: Kentmere. Parking on the lane just beyond the church (honesty box).
Time: 6 to 7 hours.


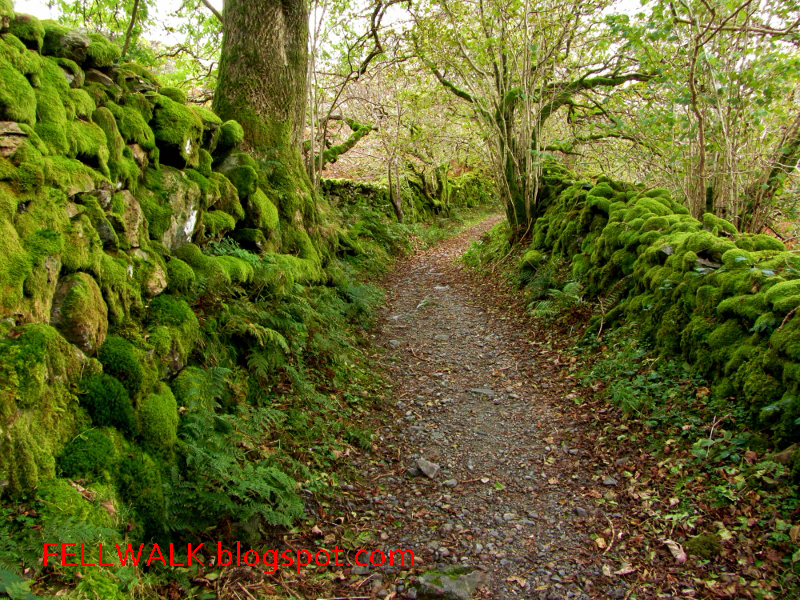
More complete descriptions of the fells and paths described in this round can be found in Wainwright's Pictoral Guides.
A Coniston Fells Round
This round starts with a gentle walk up the Walna Scar Road before branching off for the ascent of Brown and Buck Pikes. From here it's a sustained high-level traverse of the Coniston Fells before a steep descent to Low Water and the ruins of Coniston's extensive copper mines. The round includes three Wainwrights: Dow Crag, Brim Fell, and The Old Man of Coniston.
Start / end: car park at the end of the Walna Scar Road. Reaching the car park involves driving up a steep and narrow lane - not for the faint hearted.
Time: 4 to 5 hours


Route ideas and information from the lovely Wainwright walking guides:
Tuesday, 31 January 2012
A Riggindale Horseshoe
A long round which commences with the delighful climb of Long Stile. This walk takes in five Wainwrights: High Street, The Knott, Rampsgill Head, High Raise and Kidsty Pike.
Start / End: car park at Mardale Head.
Time: 5 to 6 hours.


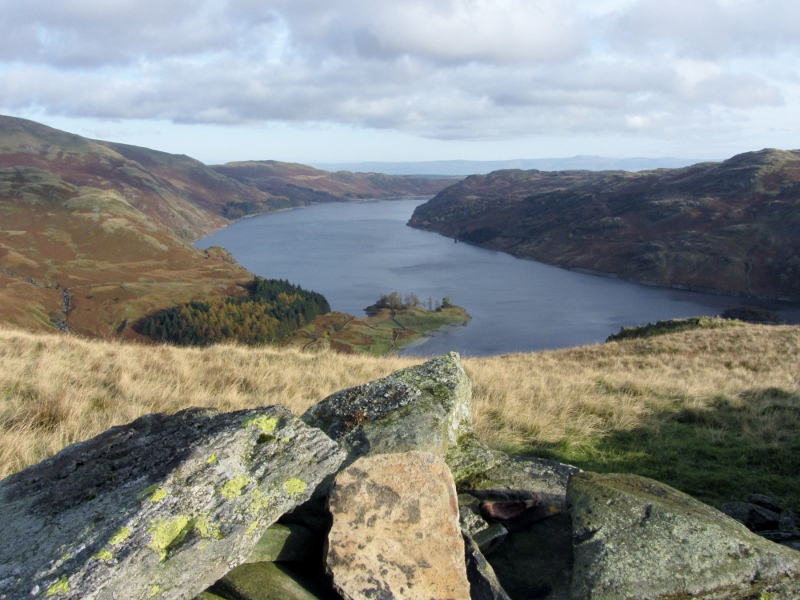


Route ideas and information are from the Wainwright walking guides:
Monday, 30 January 2012
A Helvellyn Horseshoe
A long but thoroughly enjoyable circular walk which takes in five Wainwrights: Dollywaggon Pike, Nethermost Pike, Helvellyn, Whiteside and Raise.
Start / End: Glenridding or Patterdale.
Time: 5 to 7 hours.


Route ideas and information are taken from Wainwright's excellent walking guides:
Subscribe to:
Posts (Atom)